Setting up a website with Hugo, Github and Travis
You’ll find in this article, all the element to setting up a website based on the following tools :
- Hugo : Static website generator
- Github : Web hosting and development source management service (using Git)
- Travis CI : Web service to test and deploy developments
- Gandi : Domain name provider
Objective
- Create a Github repository to store the source code to generate the static website (documentation)
- Create a Github repository to store the generated static website elements (pragmatias.github.io)
- Configure Travis CI to trigger the static website generation in the repository pragmatias.github.io after a commit in the branch master from the repository documentation
- Management of a personal domain name from Gandi to display the static website with url pragmatias.fr
Source code
All the source code of this website can be found on my dépôt github repository.
Create a Github repository
Create the repository documentation
Prerequisites : have an account at Github
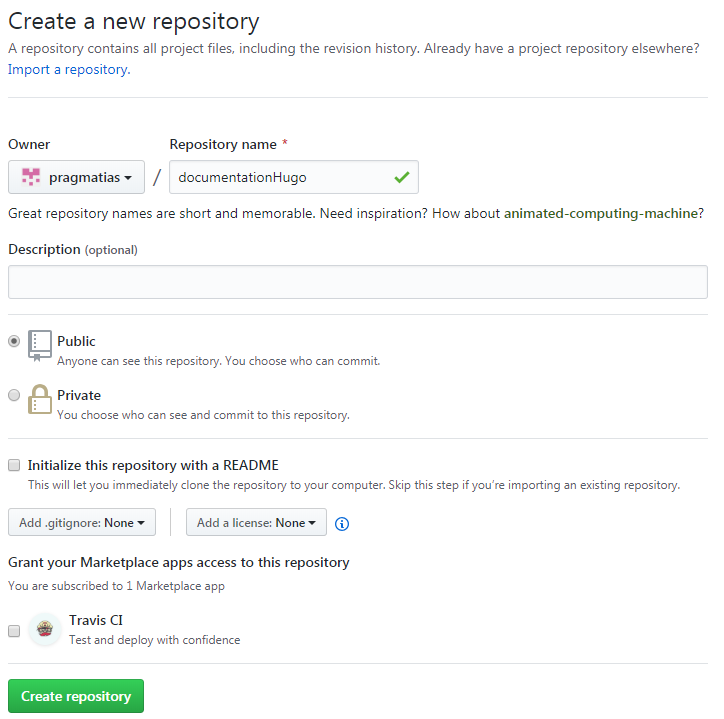
1. On your repository listing page, click on New
2. Fill the name of your repository that will contain the sources code to generate the website and click on Create repository
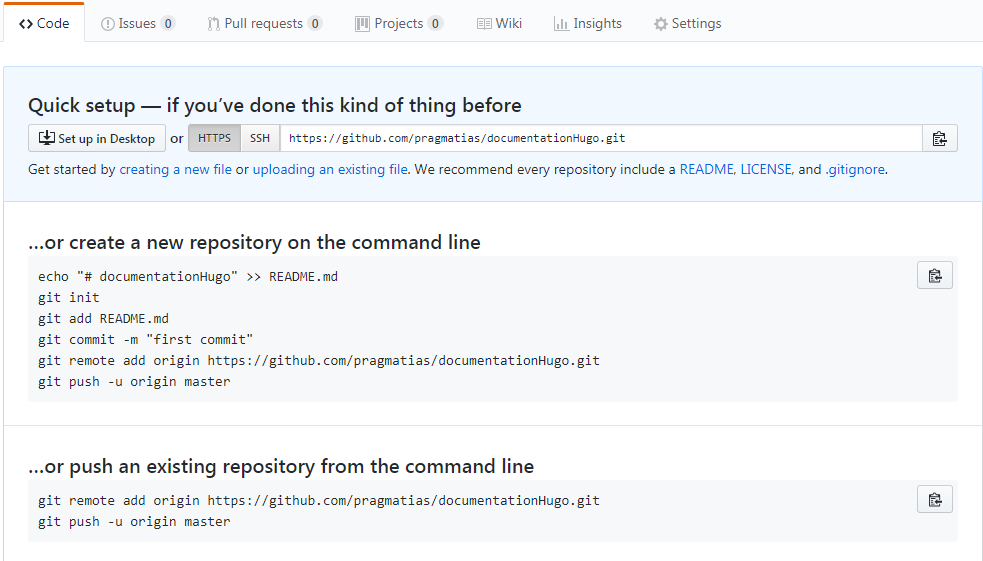
3. Github will show you the steps to initialize your repository
Create the repository pragmatias.github.io
You have to do the same step as for the creation of the repository documentation but this time with the name pragmatias.github.io.
You need to create at least one file in the repository pragmatias.github.io to configure the repository.
You will find more information about Github Pages system on the official website.
If you want to change the default configuration :
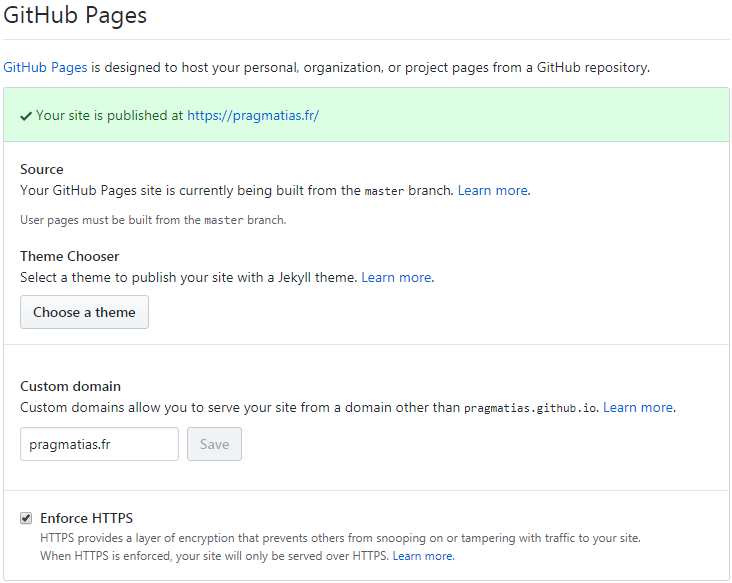
1. Go on the Settings page of the repository pragmatias.github.io
2. Go in the GitHub Pages section to configure the needed informations (custom domain, enforces HTTPS, …)
Linking Travis CI with a Github repository
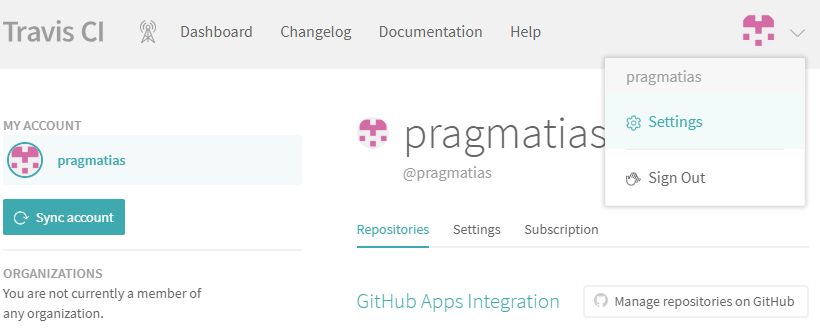
1. Login on Travis CI with your Github account
2. Go in Settings, then in Repositories and click on Manage repositories on Github
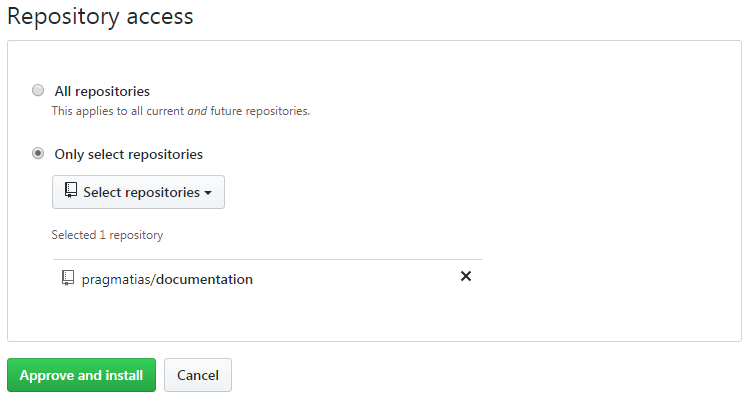
3. On Github, in the Repository access section, add the repository documentation and click on Approve and install
Configure Travis CI actions on a Github repository
Manage a Github token
First, you have to create a Github token allowing to give the right at Travis CI to do the commit action on the target repository.
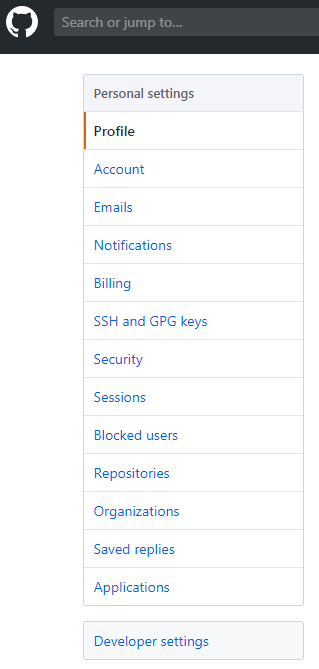
1. Login on your Github account, go in settings and click on Developer settings
2. Click on Personal access tokens, then click on Generate new token
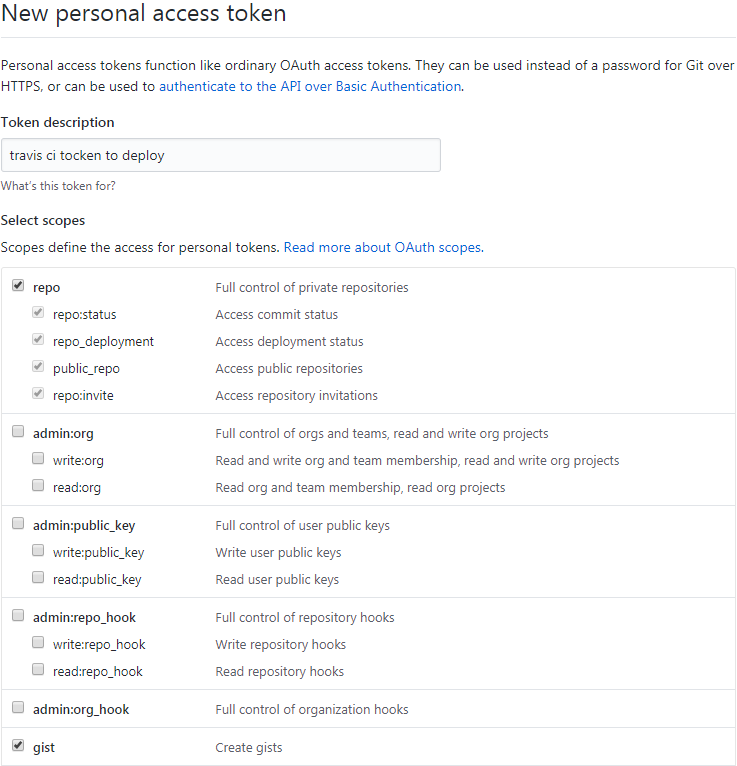
3. Fill the Tocken description field, then select the necessary rights (repo et gist) and click on Generate token
4. Copy the code displayed after the token generation (it will only be displayed once)
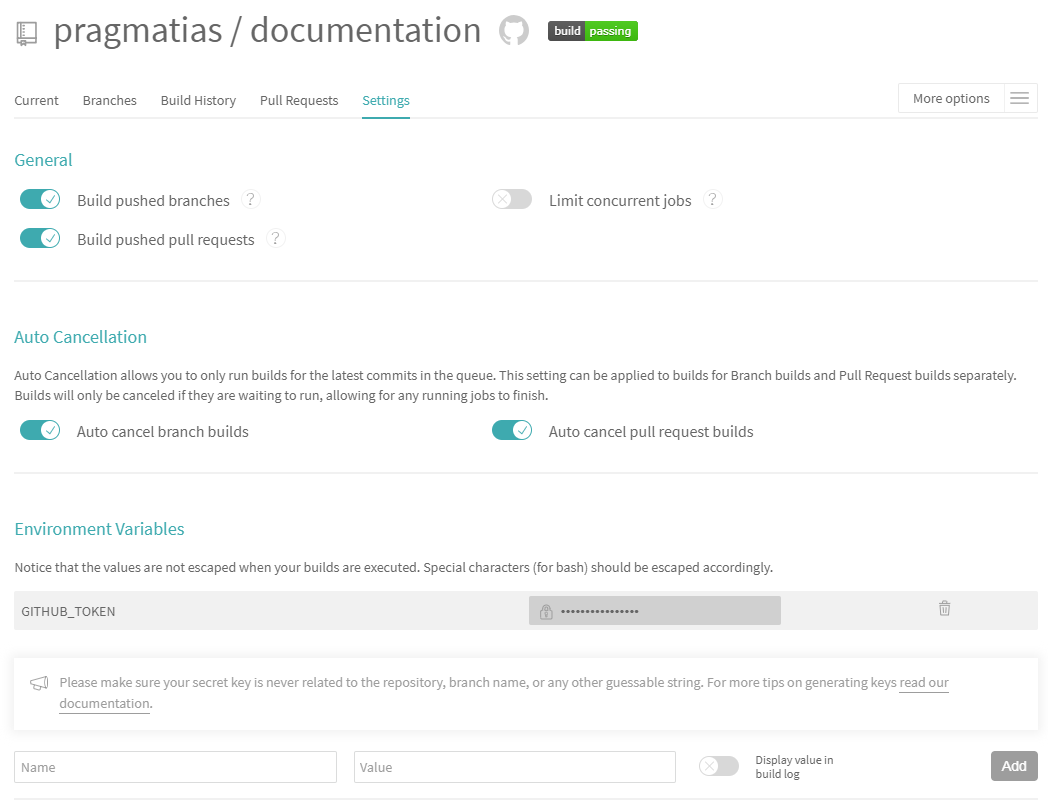
5. Go on Travis CI and add the token with the name GITHUB_TOKEN and the value from the previous step.
Create the configuration file for Travis CI
To be able to automatically deploy the website from the repository documentation to the repository pragmatias.github.com, you must create a file .travis.yml at the root of the repository documentation
 1# https://docs.travis-ci.com/user/deployment/pages/
 2# https://docs.travis-ci.com/user/reference/trusty/
 3# https://docs.travis-ci.com/user/customizing-the-build/
 4
 5dist: trusty
 6
 7install:
 8  - wget -O /tmp/hugo.deb https://github.com/gohugoio/hugo/releases/download/v0.54.0/hugo_0.54.0_Linux-64bit.deb
 9  - sudo dpkg -i /tmp/hugo.deb
10
11before_script:
12    - rm -rf public 2> /dev/null
13
14# script - run the build script
15script:
16    - hugo
17
18deploy:
19  provider: pages
20  skip-cleanup: true
21  github-token: $GITHUB_TOKEN
22  verbose: true
23  keep-history: true
24  local-dir: public
25  repo: pragmatias/pragmatias.github.io
26  target_branch: master  # branch contains blog content
27  on:
28    branch: master  # branch contains Hugo generator code
The content of this file is :
- Use the Ubuntu Trusty distribution
dist: trusty - Download and installation of the Hugo tool for Linux
install: ... - delete the folder public which is the default generation folder for Hugo
before_script: ... - Run the Hugo tool
script: ... - For the deployment part :
- We define that we want to deploy the content of the directory public after executing the part script in the repository pragmatias/pragmatias.github.io
- We define that we want to use the master branch for both repositories (source and target)
- We define that the target is Github Pages
provider: pages
Using a personal domain with Github Pages
*Note : i use the domain name * pragmatias.fr at Gandi
1. In the pragmatias.github.io repository parameters, fill then Custom domain section
to force the https, selection the Enforce HTTPS option.
2. Modify the script section of the .travis.yml file
1# script - run the build script
2script:
3    - hugo
4    - echo "pragmatias.fr" > public/CNAME
3. Configure your domain to redirect users to the content of the Pages of the repository pragmatias.github.io
3.1. Go to Gandi’s website, click on Domain name, then on the desired domain name
3.2. Go to Enregistrement DNS to modify the records
3.3. Add the following DNS records (to redirect between the Github Pages service and your domain name)
1@ 1800 IN A 185.199.108.153
2@ 1800 IN A 185.199.109.153
3@ 1800 IN A 185.199.110.153
4@ 1800 IN A 185.199.111.153
5www 10800 IN CNAME pragmatias.github.io
Be careful not to have any other lines starting with @ 1800 IN A ou par www
It may take several hours for the modification of records to be propagate before they are taken into account.


