Installing Nextcloud on a Synology NAS
In this article, you will find all the elements/steps to install Nextcloud application on a Synology NAS.
What’s Nextcloud
Nextcloud is a open source software offering a platform for file storage and sharing services as well as online applications.
Objective
In the context of this installation, the following information should be taken into account:
- The Synology NAS is accessible from the IP 192.168.51.54
- The Nextcloud application is in version 17.0
- The Nextcloud application must be accessible from the outside using the subdomain nextcloud.alpha.osf
- The IP provided by the ISP is changed regularly, the Synology NAS must be configured to link the ncalpha.synology.me address to the public IP.
- The administrator account of the Synology NAS is NasUsr
Applications required on the Synology NAS
On the Synology NAS, it’s required to install the following applications by using the Package Center :
- PHP 7.2 : Programming language
- MariaDB 10 : Relational database
- phpMyAdmin : Administration interface for MariaDB
- Apache HTTP Server 2.4 : Web server
- Web Station : Application to administer the web server
Enabling SSH access on the Synology NAS
The SSH access will allow to install the Nextcloud application from the command line.
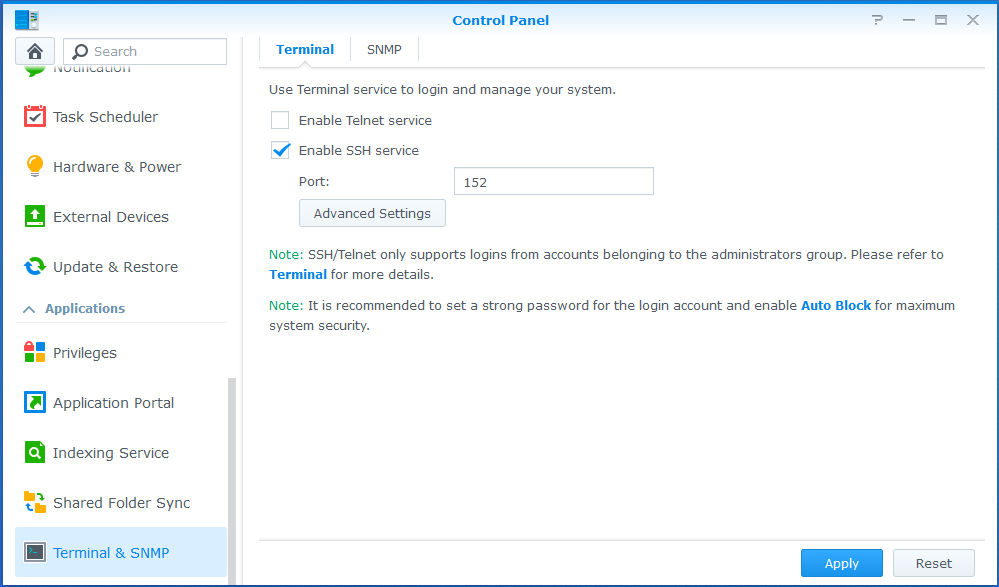
To activate SSH access, the following steps must be followed :
- Go to Control Panel
- Click on Terminal & SNMP
- Click on Terminal
- Check the option Enable SSH service
Connexion au NAS Synology par SSH
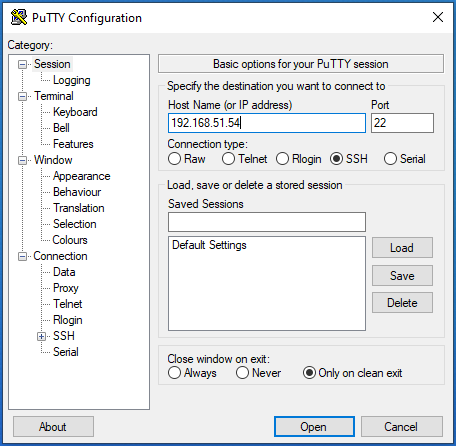
Récupérez l’application Putty et suivez les étapes suivantes :
- Run Putty
- Fill Host Name with the NAS IP :
192.168.51.54 - Fill Port with the port defined on the NAS :
22 - Click on the button Open to connect on the NAS
- Enter the NAS user name and password :
NasUsr
Installing the Nextcloud application
Once connected in SSH on the NAS, follow these steps :
- Switch to admin mode :
sudo -iand enter the user password NasUsr - Create the folder web :
mkdir -p /volume1/web - Create the folder nextcloud for data storage :
mkdir -p /volume1/nextcloud - Move to the directory web :
cd /volume1/web - Download the Nextcloud application on the official website :
wget https://download.nextcloud.com/server/releases/nextcloud-17.0.0.zip - Unzip the Nextcloud application archive :
7z x nextcloud-17.0.0.zip - Check that the directory web/nextcloud exist :
/volume1/web/nextcloud - Change the user http as the owner of the created directories :
1chown -R http:http /volume1/web/nextcloud/
2chown -R http:http /volume1/nextcloud/
3chown http:http /volume1/web/nextcloud/.htaccess
- Change the permissions of directories and files :
1find /volume1/web/nextcloud/ -type f -print0 | xargs -0 chmod 777
2find /volume1/web/nextcloud/ -type d -print0 | xargs -0 chmod 777
3find /volume1/nextcloud/ -type d -print0 | xargs -0 chmod 777
4chmod 777 /volume1/web/nextcloud/.htaccess
- Modify the application configuration file Nextcloud regarding the following two parameters :
/volume1/web/nextcloud/config/config.php
1'trusted_domains' =>
2	array (
3		0 => '192.168.51.54'
4		1 => 'nextcloud.alpha.osf'
5	),
6'overwrite.cli.url' => 'https://nextcloud.alpha.osf'
Configuring the Web Station application
Configure the Web Station application by following these steps :
- Open the Package Center
- Select Installed
- Select Open on Web Station application
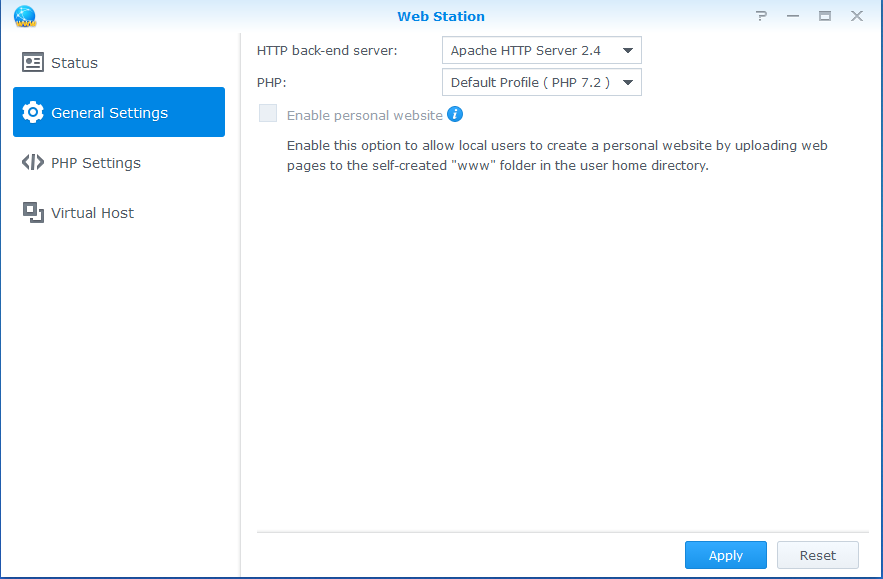
- Select the tab General Settings and fill in the following information :
- HTTP back-end server :
Apache HTTP Server 2.4 - PHP :
Default Profile ( PHP 7.2 )
- HTTP back-end server :
- Select the tab PHP Settings and click on the button Create
- Select the tab General Settings and fill in the following information :
- Profile Name :
Default Profile - Description :
Default PHP 7.2 Profile - PHP Version :
PHP 7.2 - Check the box
Enable PHP cache - Check the box
Customize PHP open_basedirand fill in the following value/tmp:/var/services/tmp:/var/services/web:/var/services/homes:/volume1/nextcloud - Select the desired extensions
- Click on the button OK
- Profile Name :
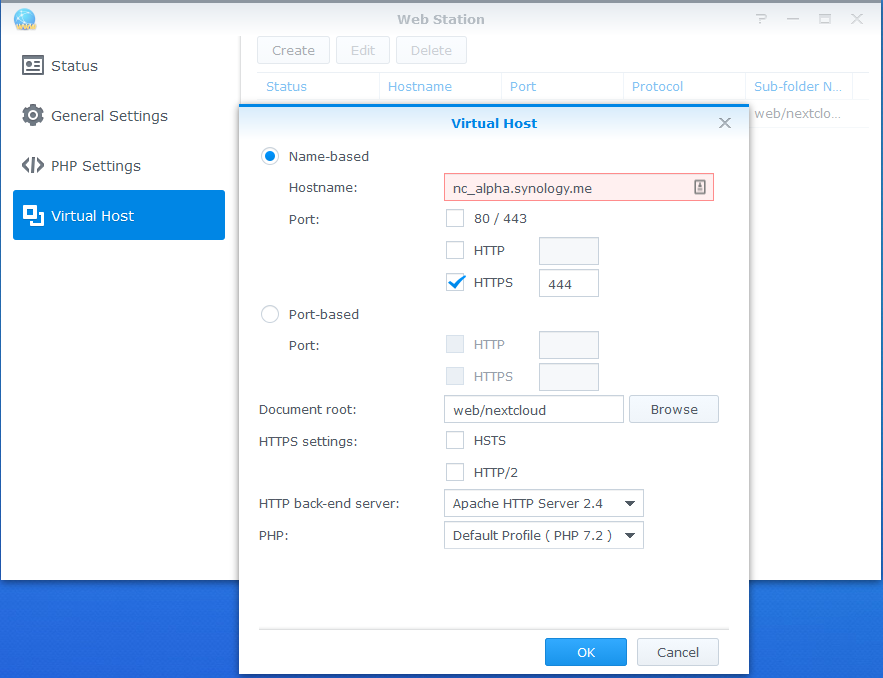
- Select the tab Virtual Host, click on the button Create and fill in the following elements :
- click on the button
Name-based - Hostname :
ncalpha.synology.me - Port :
HTTPS 444 - Document root :
web/nextcloud - HTTP back-end server:
Apache HTTP Server 2.4 - PHP :
Default Profile (PHP 7.2) - Click on the button OK
- click on the button
MariaDB configuration
Configure the MariaDB database by following these steps :
- Open the Package Center
- Select Installed
- Select Open on the MariaDB application
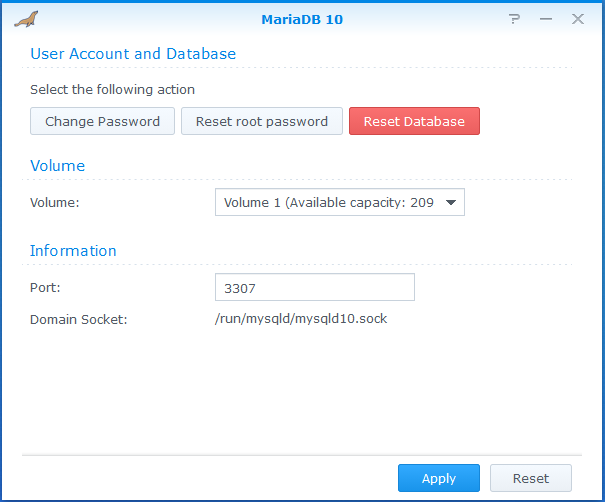
- Click on the button Reset Database
- Click on the button Reset root password (PasswordRootMariaDB)
- Fill in the port
3307
Nextcloud application initialization
- Connect to the home page via the local network :
http://192.168.51.54/nextcloud/index.php - Fill in the following information :
- Data folder :
/volume1/nextcloud/data - Configure the database :
mysql/MariaDB - Database User :
root - Database Password :
PasswordRootMariaDB - Database Name :
nextcloud - Localhost :
127.0.0.1:3307
- Data folder :
Link the public address of the NAS on a domain (dns)
Configure the DDNS on the Synology NAS by following these steps :
- Open the Control Panel
- Select the menu External Access
- Select the tab DDNS
- Click on the button Add
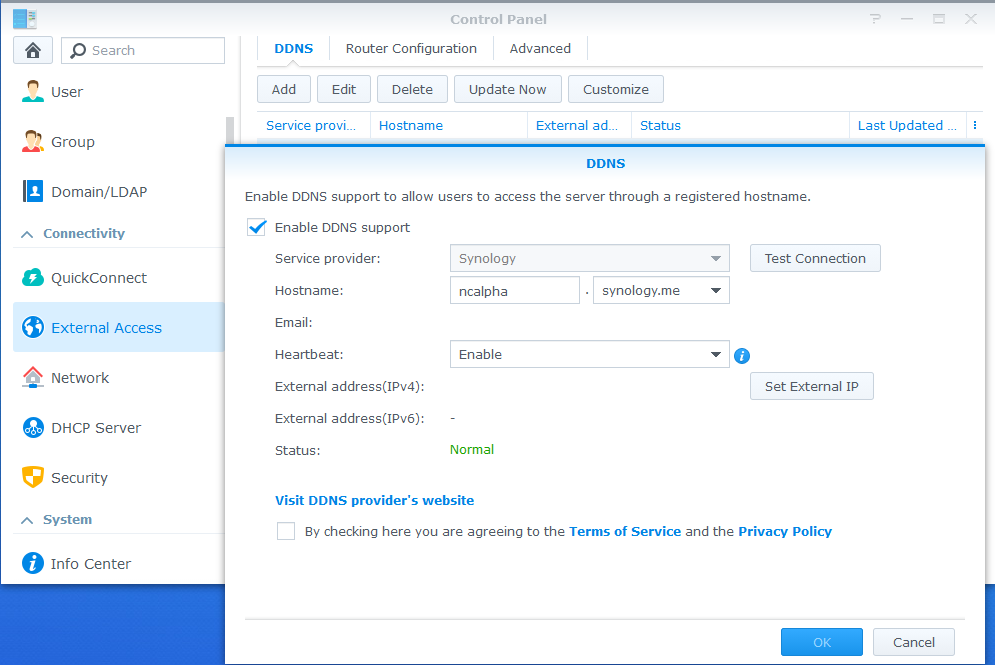
- Check the box Enable DDNS support and fill in the following information :
- Service provider :
Synology - Hostname :
ncalpha.synology.me - Heartbeat :
Activer - Click on the button OK
- Service provider :
Configure your alpha.osf domain to use the synology.me domain :
- Add the following line to the alpha.osf domain’s DNS record :
nc 10800 IN CNAME ncalpha.synology.me.
Note: it can take several hours for DNS records to be propagated
Certificate configuration (https)
Configure a Let’s Encrypt certificate on the Synology NAS by following these steps :
- Open the Control Panel
- Select the menu Security
- Select the tab Certificate
- Click on the button Add
- Click on Add a new certificate and click on the button Next
- Select Get a certificate from Let’s Encrypt
- Fill in Description :
nextcloud.alpha.osf - Check the box Set as default certificate
- Fill in the following information and click on the button Apply :
- Domain name :
nextcloud.alpha.osf - Email :
admin@alpha.osf
- Domain name :
- Click on the button Configure and associate the
nextcloud.alpha.osfcertificate with the desired services. - Click on the button OK


